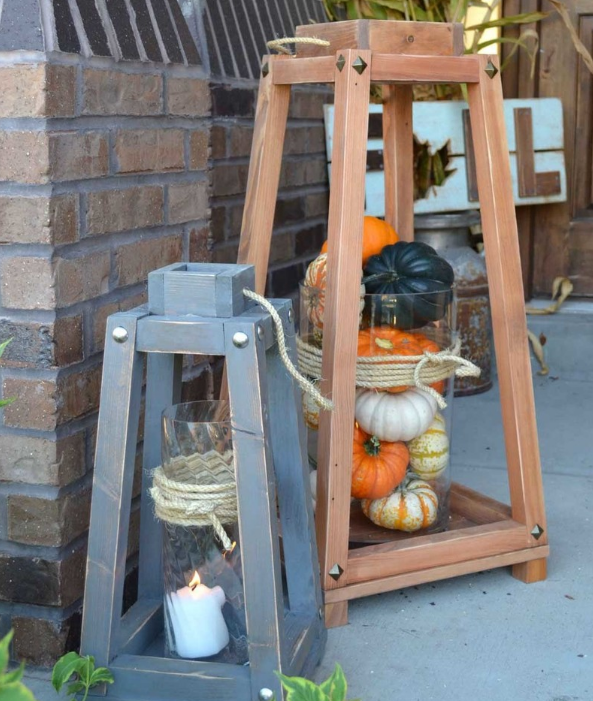
As the days are getting shorter and the early nights are creeping in. These rustic wooden lanterns are both a great decorational piece but also practical. The rustic charm of decorating your front porch for autumn with lanterns or even wedding or party decorations makes a real statement!
These easy to make wooden lanterns can be easily filled with different decorations to suit the time of year and holiday season so they can be used all year round!
This guide will show you how to build two wood lanterns in sizes 86cm and 53cm.
For this project you will need:
STEP 1

Make the cuts according to which size of lantern you are making. You might find it easiest to sand all of the pieces before assembling the lantern.
STEP 2
Using a compound mitre saw, cut the 4 legs (45cm or 76cm) with a 5° mitre angle and 5° bevel angle (head tilt) on both ends of the legs.
STEP 3
Cut the horizontal rails with a 5° mitre angle on each end, the mitres need to be in the opposite direction from each other, making a trapezoid. It is best to trim the two corners that will face the inside of the lantern. I set the mitre saw at 45° and removed about 6mm of the corner material.
STEP 4
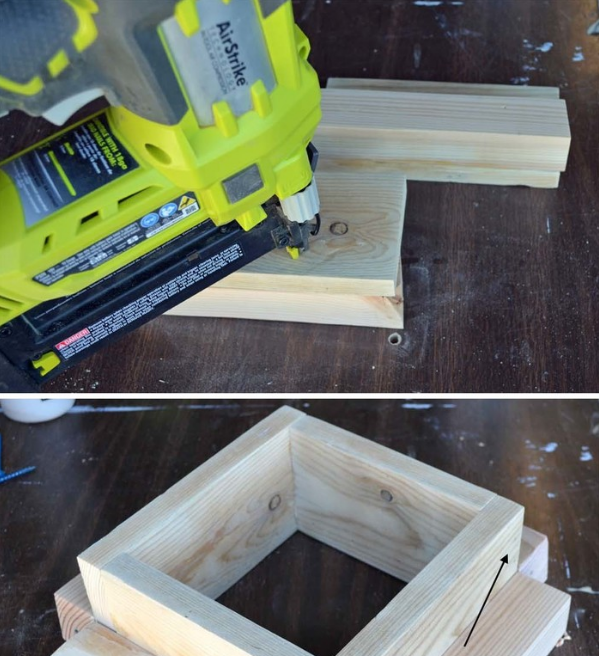
The lantern top is made from the 4 shorter rail pieces and the short 1x4’s (20cm & 15cm or 10cm & 6cm). Centre a 1x4 piece on a short rail piece, making the bottoms flush and glue and nail into place. Repeat for each rail. Glue and nail the four 1x4’s together making a box.
STEP 5
Assemble two legs to a long rail. The rail bottom and leg ends should stay flush. I prefer the outside top corner of the rail to be flush with the outside face of the leg, purely for looks. Apply wood glue then clamp a leg to a rail, predrill a hole and screw the leg to the rail. Repeat for each leg.
STEP 6

Attach the two leg assemblies the same way as the legs are attached to the rails. Apply wood glue then clamp a leg assembly to a rail, pre-drill a hole and screw the leg to the rail. Repeat until all four sides are secure.
STEP 7
Attach the legs to the top. Apply wood glue then clamp a leg to a short rail, predrill a hole and screw the leg to the rail. Repeat for each leg. I decided to drop the top about 3mm from the top of the legs to add variation.
STEP 8

Turn the lantern upside down and lay out the planks (26cm or 40cm) for the lantern bottom. Trim the 1x4 planks as necessary, I left about 3mm overhang around the bottom. Apply wood glue and nail the planks to the lantern base. Attach the feet to the bottom with wood glue and nails.
STEP 9
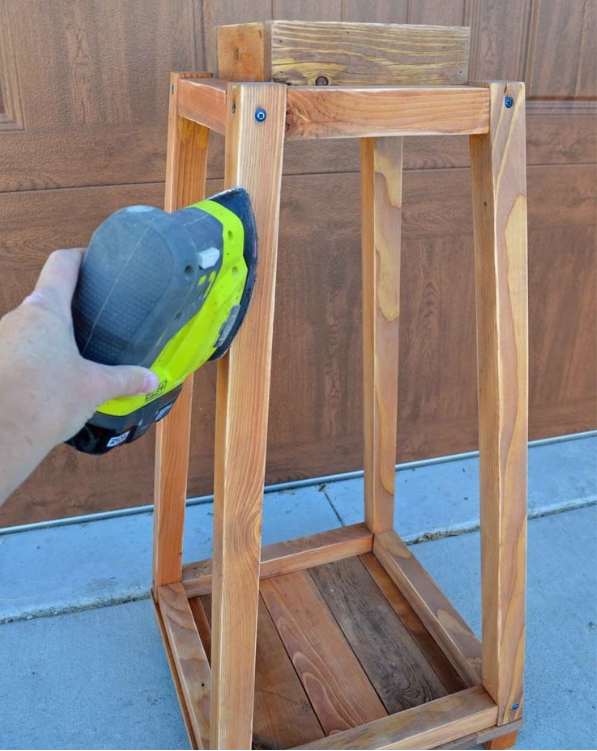
Sand the lantern until smooth, finishing with 120 grit sandpaper, always finish sanding in the direction of the grain. Apply wood conditioner and stain to the lantern. Once the stain is dry, you can distress the finish as desired.
STEP 10
Drill 2 holes through the top 1x4’s. Thread a rope through the holes and tie knots on the inside of the top. Add decorative nails if you want to cover up the screw heads.
Dont forget to tag us in your DIY projects @ryobitoolseu